-
Linux Logical Volume Management
Table of Contents
Creating a logical volume and volume group
- Make sure the physical disk is listed as block device
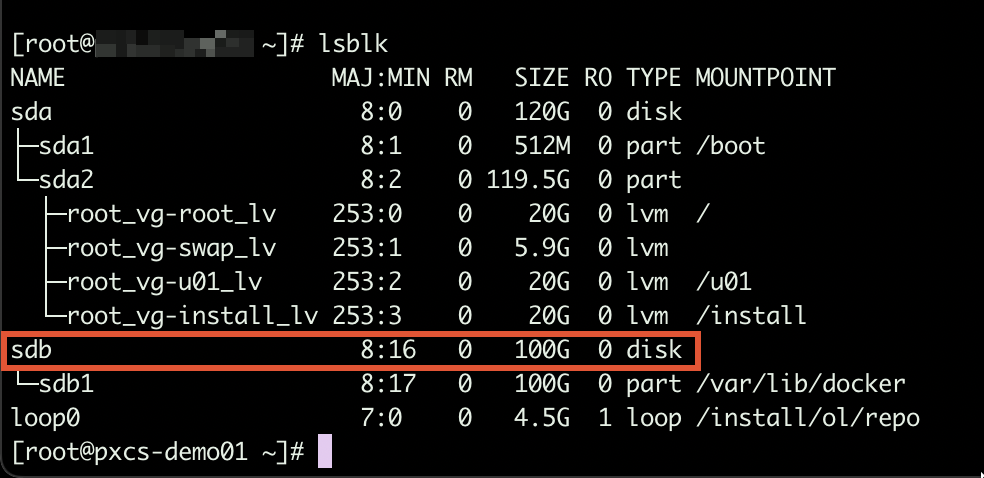
Checking block devices with lsblk - Create a new primary partition on the disk (partition type = 8e)
fdisk /dev/sdx # Replace "sdx" with your block device real name
n # create new partition
p # New primary partition
1 # select Partition number (1-4) <Enter>
# partition size: Accept the default values in case you want to use the full disk available space
t # set partition type LVM linux is 8e
1 # select partition
8e # for linux lvm
w # to write
- Create a new physical volume related to the partition created above
# Physical volume creation (Replace sdx with your block device name)
pvcreate /dev/sdx1
- Create a new volume group and include the pv mentioned above to it
vgcreate testdata_vg /dev/sdx1
- Create a new logical volume as child of the volume group above, you can specify a constant size or use 100% of the volumes currently part of the volume group above
Sample 1: New logical volume with size 20 GB
lvcreate -L 20000 -n vol01 testdata_vg

Sample 2: New logical volume using 100% of available space
lvcreate -l 100%FREE -n vol01 testdata_vg
- Format the logical volume created above
Sample: Format as ext4
mkfs.ext4 /dev/testdata_vg/vol01
You can now mount the volume (device name: /dev/testdta_vg/vol01).
Extending an exiting logical volume
Adding an extra disk
- Make sure the new disk is listed as block device (lsblk)
- Create a new partition on the new disk and set the type to 8e (see instructions above)
- Create a new physical volume
pvcreate /dev/sdx1
- Extend the volume group adding the new pv to the volume group
vgextend /dev/testdata_vg /dev/sdx1
- Extend the logical volume so that is can use all space available now on the volume group
lvextend -l +100%FREE /dev/testdata_vg/vol01
- Double check that the new volume is now part of the existing volume group (lsblk)
- Unmount the volume group
umount /your_volume_group_mount_point
- Check the file system integrity (ext filesystems only)
e2fsck -f /dev/testdata_vg/vol01
- Extend the file system (command for ext file systems)
resize2fs /dev/testdata_vg/vol01
- Extend the file system (command for xfs file systems)
Make sure that volume group is mounted before to issue the command below
xfs_grows /dev/testdata_vg/vol01
- Mount the drive (if not already mounted . . .)
mount /your_volume_group_mount_point
- Double check that now the volume group is using all new available disk space
df -h
Adding extra space added to an already existing disk
- Check the current partitions on extended physical disk
fdisk -l /dev/sdx
- Create a new primary partition and set type to 8e (see instructions above)
- Create a new physical volume
- Extend the volume group adding the new physical volume to the volume group
vgextend /dev/testdata_vg /dev/sdx1
- Extend the logical volume so that is can use all available size of the volume group
lvextend -l +100%FREE /dev/testdata_vg/vol01
- Check the integrity (ext file systems only)
e2fsck -f /dev/testdata_vg/vol01
- Extend the file system (command for ext file systems)
resize2fs /dev/testdata_vg/vol01
- Extend the file system (command for xfs file systems)
Make sure that volume group is mounted before to issue the command below
xfs_grows /dev/testdata_vg/vol01
- Mount the drive (if not already mounted . . .)
mount /your_volume_group_mount_point
- Double check that now the volume group is using all new available disk space
df -h
Troubleshooting
mkfs command takes a very long time
To run mkfs without trim, use the -K option on XFS and -E nodiscard on ext4.
XFS:
mkfs.xfs -K /dev/sdx
EXT4:
mkfs.ext4 -E nodiscard /dev/sdx
lsblk/df does not show volume changes
Reload the partition table with the command ‘partprobe’
A new disk has been attached to the VM, but it’s not listed as block device
Option #1: Reboot the VM
Option #2: Force the OS to scan list of attached block devices:
for host in /sys/class/scsi_host/*; do echo "- - -" | sudo tee $host/scan; ls /dev/sd* ; done
-
Accessing a webdav drive from Linux shell
Table of Contents
Option 1: Connect on an interactive session
Pre-requisites
- You need to retrieve the webdav URL from your provider. Sample:
https://testportal.com/remote.php/dav/files/your_username/- Install command line tool “cadaver” (installation method depends on your Linux distribution)
Connecting via “cadaver”
cadaver https://testportal.com/remote.php/dav/files/your_username/You will be prompted to provide your password. Once logged in, you will be connected to a webdav shell.
Available commands
ls [path]
    List contents of current [or other] collection
cd path
    Change to specified collection
pwd
    Display name of current collection
put local [remote]
    Upload local file
get remote [local]
    Download remote resource
mget remote...
    Download many remote resources
mput local...
    Upload many local files
edit resource
    Edit given resource
less remote...
    Display remote resource through pager
mkcol remote...
    Create remote collection(s)
cat remote...
    Display remote resource(s)
delete remote...
    Delete non-collection resource(s)
rmcol remote...
    Delete remote collections and ALL contents
copy source... dest
    Copy resource(s) from source to dest
move source... dest
    Move resource(s) from source to dest
lock resource
    Lock given resource
unlock resource
    Unlock given resource
discover resource
    Display lock information for resource
steal resource
    Steal lock token for resource
showlocks
    Display list of owned locks
propnames res
    Names of properties defined on resource
chexec [+|-] remote
    Change isexecutable property of resource
propget res [propname]
    Retrieve properties of resource
propset res propname value
    Set property on resource
set [option] [value]
    Set an option, or display options
open URL
    Open connection to given URL
close
    Close current connection
quit
    Exit program
unset [option] [value]
    Unsets or clears value from option.
lcd [directory]
    Change local working directory
lls [options]
    Display local directory listing
lpwd
    Print local working directory
logout
    Logout of authentication session
help [command]
    Display help message
Option #2: Mount the remote webdav as a local folder
I find this method much more convenient.
- Install davfs file system drivers
- apt-get install davfs2 or yum install davfs2
- Add your local user to “davfs” group
- usermod -aG davfs2 <username>
- Create a local folder to use as mount point
- mkdir /yourmountpoint
- Create a folder to store your users’s davfs settings
- mkdir ~/.davfs2
- Copy davfs global settings to your user’s folder
- cp /etc/davfs2/secrets ~/.davfs2/secrets
- Add an entry to /etc/fstab:
https://testportal.com/remote.php/dav/files/your_username/ /yourmountpoint davfs user,rw,noauto 0 0- Mount the share
- mount /yourmountpoint
-
Linux swap partition management
Table of Contents
Creating a new swap space from a new disk
- Format the new partition with:
mkswap /dev/sdx1- Add the new swap partition to /etc/fstab
/dev/sdx1 swap swap defaults 0 0- Run swapon -a to activate the new swap.
Creating a new swap file
Create the file. This command creates a 1 gigabyte file:
dd if=/dev/zero of=/swap bs=1M count=1000Format the swap file:
mkswap /swapAdd the new swap file to /etc/fstab:
/swap swap swap defaults 0 0Run swapon -a to activate immediately the new swap space.
Deactivating an existing swap space
- Run “swapoff -a“
- Comment / delete the related entry on file /etc/fstab
/dev/sdx1 swap swap defaults 0 0 -
(My) rsync cheatsheet
Table of Contents
Sync folder using 5 parallel threads
ls -1 /testdata/testdb | xargs -I {} -P 5 -n 1 rsync -avh /testdata/testdb/{} root@10.64.4.3:/testdata/testdb_from_aio01/Sync content from folder A to folder B
If you want the contents of folders A and B to be the same, put /home/user/A/ (with the slash) as source. By doing so, all folder A’s content will end up into folder B.
Like this:
rsync --progress -avuzp --delete "/home/user/A/" "/home/user/B"
Arguments:
    -a Do the sync preserving all filesystem attributes
    -v run verbosely
    -u only copy files with a newer modification time (or size difference if the times are equal)
    --delete delete the files in target folder that do not exist in the source
Sync content (including symlinks) from source to destination host via SSH
rsync --progress -avuzhp /source/dir root@DESTINATION_HOST_IP_ADDRESS:/destination/dir
-
screen (Linux OS utility)
Open a new (named) screen:
screen -S session_nameLists all existing screen sessions:
screen -lsReconnects to an existing (detached) screen session:
screen -r SCREEN_NAME_OR_NUMBERForce/reconnect to an Attached screen session:
screen -rd SCREEN_NAME_OR_NUMBERMost useful keyboard shortcuts to manage an open session:
    Ctrl+a d Detach from current screen (without destroying it)
    Ctrl+a c Create a new window (with shell)
    Ctrl+a " List all window
    Ctrl+a 0 Switch to window 0 (by number )
    Ctrl+a A Rename the current window
    Ctrl+a S Split current region horizontally into two regions
    Ctrl+a | Split current region vertically into two regions
    Ctrl+a tab Switch the input focus to the next region
    Ctrl+a Ctrl+a Toggle between the current and previous region
    Ctrl+a Q Close all regions but the current one
    Ctrl+a X Close the current region
    Ctrl+a ESC Enters in copy mode (you can scroll the buffer with up/down pageup/pagedown keys), press ESC to return to the shell
    Ctrl+a [ Enters in copy mode (you can scroll the buffer with up/down pageup/pagedown keys), press ESC to return to the shell
        Once into copy mode:
          Move cursor to the text you want to copy
          Press SPACE to start highlighting
          Move cursor to end of text you want to copy
          Press SPACE to copy to the clipboard and exit from copy mode
          Press Ctrl+a ] to paste the text
Resizing a screen Tab:
type Ctrl-a :resize +10 to increase sizeHow to unfreeze from accidental pressing of Ctrl-S:
type Ctrl+qSample ~/.screenrc
# Turn off the welcome message
startup_message off

# Disable visual bell
vbell off

# Set scrollback buffer to 10000
defscrollback 10000

# Customize the status line
hardstatus alwayslastline
hardstatus string '%{= kG}[ %{G}%H %{g}][%= %{= kw}%?%-Lw%?%{r}(%{W}%n*%f%t%?(%u)%?%{r})%{w}%?%+Lw%?%?%= %{g}][%{B} %m-%d %{W}%c %{g}]'